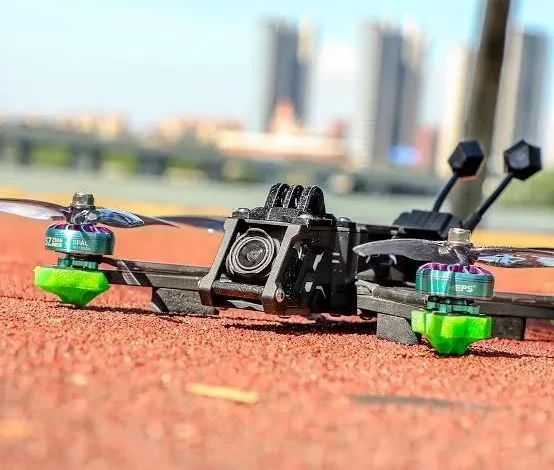
A clear framework for selecting motors by aircraft size, battery system, propeller load, and the way you plan to fly.
The motor is part of a power system
An FPV motor turns electrical energy into the thrust that makes every maneuver possible, but it never works alone. Its behavior depends on the battery voltage, ESC, propeller, airframe weight, tune and airflow around the quad. That is why selecting a motor by color, price or a single popular KV rating often produces disappointing results. A better approach is to decide what the aircraft must do, then choose a motor that fits that task. The goal may be low-noise indoor flying, cinematic cruising, freestyle control, lap-after-lap racing or efficient long-range travel. Each goal changes the balance between weight, torque, responsiveness and usable flight time.
Read motor size correctly
Most brushless FPV motors use a four-digit stator code, such as 1404, 2207 or 2806.5. The first two digits describe stator diameter and the last digits describe stator height. These dimensions help indicate the motor class, but they do not replace a complete compatibility check. Smaller motors typically suit smaller propellers and lower all-up weight; larger motors are commonly used where bigger props, payload or torque demand are involved. A 5-inch build, for example, often lives in a different motor range from a 2-inch cinewhoop or a 7-inch long-range platform. Always start with propeller diameter and frame intent, then use the motor size to narrow the field.
KV is a voltage relationship not a power score
KV describes an approximate no-load speed per volt. It is not a direct measure of quality, torque or total thrust. The right KV depends on voltage and propeller load. Higher voltage systems generally pair with lower KV variants for a comparable propeller class, while lower voltage systems may need a higher KV to reach a useful operating range. A propeller with more pitch or more blades also increases load. If the combination is too aggressive, the result can be heat, voltage sag and shortened component life. Treat the manufacturer’s voltage and propeller guidance as the first boundary, and keep a new build within that boundary during initial flights.
Choose for the aircraft you are actually building
A small whoop needs light components and rapid spool-up on small props. A cinewhoop must balance guarded propellers, duct efficiency, video equipment and a smooth throttle curve. A five-inch freestyle quad often prioritizes durability and controlled response, while a racing build may emphasize acceleration and top-end performance. Long-range designs commonly favor efficiency and a propeller-motor combination that can carry the required battery without excessive current draw. These are tendencies, not rules. The useful question is: what prop size, battery, payload and flight style must this build support? That answer is more reliable than choosing a motor category by marketing label alone.
Use a category page to compare the right details
A well-organized fpv drone motors category makes it easier to compare parts across build types without losing the details that matter. Filter by motor size, intended aircraft class or KV where those filters are available, then open the candidates and compare their mounting pattern, voltage range, motor weight, shaft format and recommended propeller range. For a complete build, make a small compatibility list beside the browser: frame arm width, screw length, prop size, battery cells, ESC rating and target all-up weight. This turns browsing into a repeatable selection process and prevents a seemingly small mismatch from reaching the soldering bench.
Balance torque response and efficiency
Torque helps a motor change propeller speed quickly, which pilots often notice as a more direct feel in sharp moves. Efficiency matters when flight time, battery temperature and range are priorities. The tradeoff is not absolute, because construction choices and propellers affect both, but it is useful to acknowledge. A heavy or high-pitch propeller may deliver a dramatic response while placing more demand on the battery. A gentler propeller can reduce current draw and heat while softening the feel. Decide the required behavior first, then tune the propeller choice within the motor’s recommended range rather than expecting one motor to deliver every characteristic at once.
Protect the motor through installation and maintenance
The correct motor can still fail early if it is installed carelessly. Verify that mounting screws cannot contact the windings. Route wires clear of the propeller arc, support them where vibration could cause fatigue, and check each bell for smooth rotation. Before the first full flight, confirm motor direction and make a gentle test for unusual heat or roughness. After a crash, inspect the propeller, bell, shaft, bearings and wire insulation. Replace bent or badly damaged props before they create vibration that complicates tuning. Maintenance is not glamorous, but it protects the time and money invested in every build.
Test one change at a time
The most useful motor setup comes from structured testing. Begin with a conservative propeller and a known-good battery, then make a short flight and check temperatures. If you change propeller pitch, filter settings or tune values, change one item per session and record the result. Blackbox logs can help advanced pilots see whether oscillations or noise are entering the system, but even a basic temperature check and observation of flight feel are meaningful. This disciplined process reveals whether a change improved the aircraft or simply moved a problem elsewhere.
A reliable selection process
The final choice should satisfy five questions: Does the motor fit the frame? Does it suit the intended propeller and battery voltage? Can the ESC supply the expected current with margin? Does the motor weight fit the overall build target? Can you obtain matching spares for normal repairs? When all five answers are clear, the choice is usually sound. Good motor selection is less about finding a universal winner and more about matching the power system to a real aircraft and a real flying style. That mindset produces calmer first flights, simpler troubleshooting and a build that remains enjoyable long after the initial assembly.