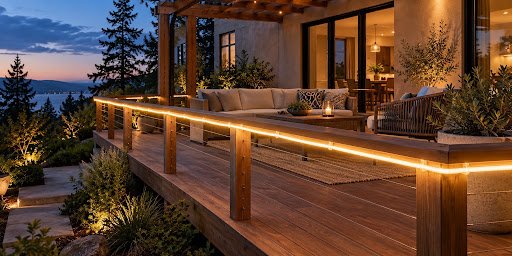
A deck railing looks unfinished when a lighting run stops short of the corner, and an overlit patio can lose the relaxed feel you wanted. A little planning helps outdoor lighting look intentional. Rope lights work well for tracing edges and architectural details because their LEDs sit inside flexible tubing that creates a continuous line of light.
The best result comes from matching the light to the location, mapping the route, and checking the product’s dimensions and installation requirements before you buy. That matters whether you are outlining a pergola, defining a garden border, or adding a soft accent beneath a deck rail.
Start with the feature you want to define
Choose one main purpose for the installation. A single line along a railing can make a patio feel more finished. A run beneath a bench can give a seating area a gentle glow. A subtle outline around a pergola can draw attention to its shape without filling the space with visible fixtures.
Walk the area at night, when you can see which edges disappear and which features already attract attention. Select one route that supports how you use the space. If you want a brighter walkway or stair tread, plan suitable functional lighting as well. Rope lighting is generally best as an accent or visual marker, and should not be assumed to provide all the light needed for safe footing.
A useful first sketch can be simple:
- Mark the feature you want to outline.
- Trace the actual path the light will follow.
- Note corners, transitions, and the nearest suitable power source.
- Decide where the plug and other connections can remain accessible and protected.
This early layout helps prevent a common design problem: choosing a length based on the straight-line distance between two points, then finding the real route requires more tubing.
Choose a route that looks deliberate
A clean installation follows a logical edge. Under a rail lip, along the outside of a pergola beam, or inside a channel can hide the tubing from direct view while letting its glow define the shape. If the light itself is part of the design, mount it where the run remains straight and consistent.
Avoid adding extra turns just because the rope can bend. Tight bends may stress the tubing or internal wiring, and a zigzag route can make an otherwise simple installation look busy. Before mounting, temporarily mark the route and view it from the places where people sit or approach the area. Check how the line looks from several angles, not just from directly beneath it.
Allow for the product’s specified bend radius and mounting method. Clips or tracks can help keep the run aligned, but the suitable accessory depends on the rope’s diameter and the product instructions. Do not secure the tubing with nails or staples that could pierce its outer jacket.
Pick a color that works with the setting
The light color changes how the outdoor space feels. Warm white often suits wood decks, brick, and relaxed seating areas. Cooler white can complement crisp, modern finishes. Colored options can add a deliberate accent to a feature or seasonal display, but they may compete with nearby landscape or porch lighting if used across too many surfaces.
For a cohesive everyday look, consider the color of existing exterior fixtures and the home’s finishes. A consistent color along one architectural edge can feel calmer than mixing several colors across the same view. If the lights will be used for a holiday display, choose a route that can work year-round or be removed without leaving visible mounting damage.
Also consider whether you want the tubing to blend in during the day. Clear tubing may be less noticeable against some surfaces, while a track can create a more finished edge. Check product images and dimensions against the intended mounting location rather than relying only on a color name.
Measure the full run before selecting a length
Measure along the route, including corners and changes in direction. Include the distance from the start of the light to the power connection, and note where connectors or end caps may sit. Keep a small diagram with measurements so you can compare it with the product’s available lengths and instructions.
Do not assume every model can be shortened. Some LED rope lights are cuttable only at marked intervals, while others should not be cut. Even a cuttable product has a specific interval, so its final length may not match your measurement exactly. If the run needs a precise fit, check whether a custom-cut option suits the project. AQLightingGroup’s custom-cut rope light selection can help you compare options made for measured runs.
Before ordering, verify the model’s voltage, maximum run, cut intervals, and required power cord, connectors, and end caps. Dimming and controller compatibility also vary. Check the exact product details rather than assuming accessories will work across different rope-light models.
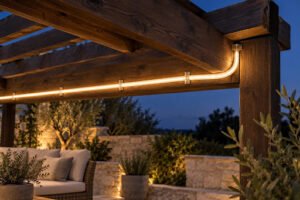
Match the product to its outdoor location
“Outdoor” does not mean every product is suited to every exposure. A covered porch, an open deck, and a spot where water collects present different conditions. Review the product’s location rating and instructions, including any guidance for connections, power cords, and cut ends. A rating for the light itself does not automatically tell you how every accessory or connection should be installed.
For a wet or exposed location, use a product specified for that setting and follow its manufacturer’s instructions. Keep plugs and connections positioned as directed, and avoid placing them where water can pool. For outdoor extension cords, choose cords marked for outdoor use. CPSC guidance explains that the construction of an outdoor cord is one of the safety characteristics relevant to its intended use.
Outdoor lighting should also use appropriate ground-fault circuit interrupter (GFCI) protection. If the work involves permanent wiring, an unfamiliar voltage system, or questions about local electrical requirements, ask a qualified electrician. These checks are part of planning the complete installation, not just selecting the light tubing.
Test and mount the run carefully
Lay out the light and accessories before fixing anything in place. Where the instructions allow, test the product before installation so you can check its operation and confirm that the route and connection points make sense. Unplug it before making adjustments.
Use only the mounting clips, track, power components, and connectors specified or recommended for the exact model. If cutting is permitted, cut only at the marked points and finish the end with the correct components. AQ Lighting rope-light guidance also notes that cutting and connecting instructions depend on the type of light.
As the run goes up, keep it aligned and avoid twisting or forcing the tubing around a sharp corner. Make sure the connection remains accessible for inspection and does not create a trip hazard. After installation, view the light from normal seating and walking positions. A small adjustment to the route can improve the overall appearance more than adding another section.
Make your next step a measured one
Before choosing a product, write down the intended location, full route length, power source, color preference, and any turns or transitions. Then compare those details with the individual product specifications and required accessories. This gives homeowners and contractors a more useful basis for selecting a model than appearance alone.
AQLightingGroup offers a selection of rope-light formats and custom-cut options. Their product pages provide details to compare before ordering. Start with the route and the setting, then use those details to select a light that fits the project.
FAQs:
- Can LED rope lights be cut to fit a deck or railing?
Only cut a model if its instructions allow it, and cut only at the marked intervals. Use the specified connectors and end caps to finish the run. - Are all rope lights suitable for outdoor installation?
No. Check the individual product’s location rating and instructions for the exact conditions where you plan to install it, including guidance for connections and power components. - Do rope lights provide enough light for outdoor steps?
They can help define an edge, but output varies by model and installation. Use appropriate functional lighting where people need clear visibility for safe footing. - What color is a good choice for a patio?
Warm white can suit a relaxed seating area, while cooler white may complement modern finishes. Consider nearby fixtures and surfaces when choosing. - How should I measure for a custom-cut run?
Measure along the complete route, including corners and the path to the power source. Compare the measurement with the product’s cut intervals and requirements before ordering.